Step 3: Deploy an Application
Now that you have a feel for how to navigate the dashboard, let's deploy a new application. In this section we will use podinfo as our sample web application.
Deploying podinfo
Clone or navigate back to your Git repository where you have bootstrapped Flux. For example:
git clone https://github.com/$GITHUB_USER/fleet-infra
cd fleet-infra
Create a
GitRepositorySource for podinfo. This will allow you to use different authentication methods for different repositories.flux create source git podinfo \
--url=https://github.com/stefanprodan/podinfo \
--branch=master \
--interval=30s \
--export > ./clusters/management/podinfo-source.yaml
More information about GitRepository is available here.
If you get stuck here, try the ls command to list your files and directories. If that doesn’t work, try ls -l ./clusters.
Commit and push the
podinfo-sourceto yourfleet-infrarepositorygit add -A && git commit -m "Add podinfo source"
git pushCreate a
kustomizationto build and apply the podinfo manifestflux create kustomization podinfo \
--target-namespace=flux-system \
--source=podinfo \
--path="./kustomize" \
--prune=true \
--interval=5m \
--export > ./clusters/management/podinfo-kustomization.yamlCommit and push the
podinfo-kustomizationto yourfleet-infrarepositorygit add -A && git commit -m "Add podinfo kustomization"
git push
View the Application in Weave GitOps
Flux will detect the updated fleet-infra and add podinfo. Navigate back to the dashboard to make sure that the podinfo application appears.
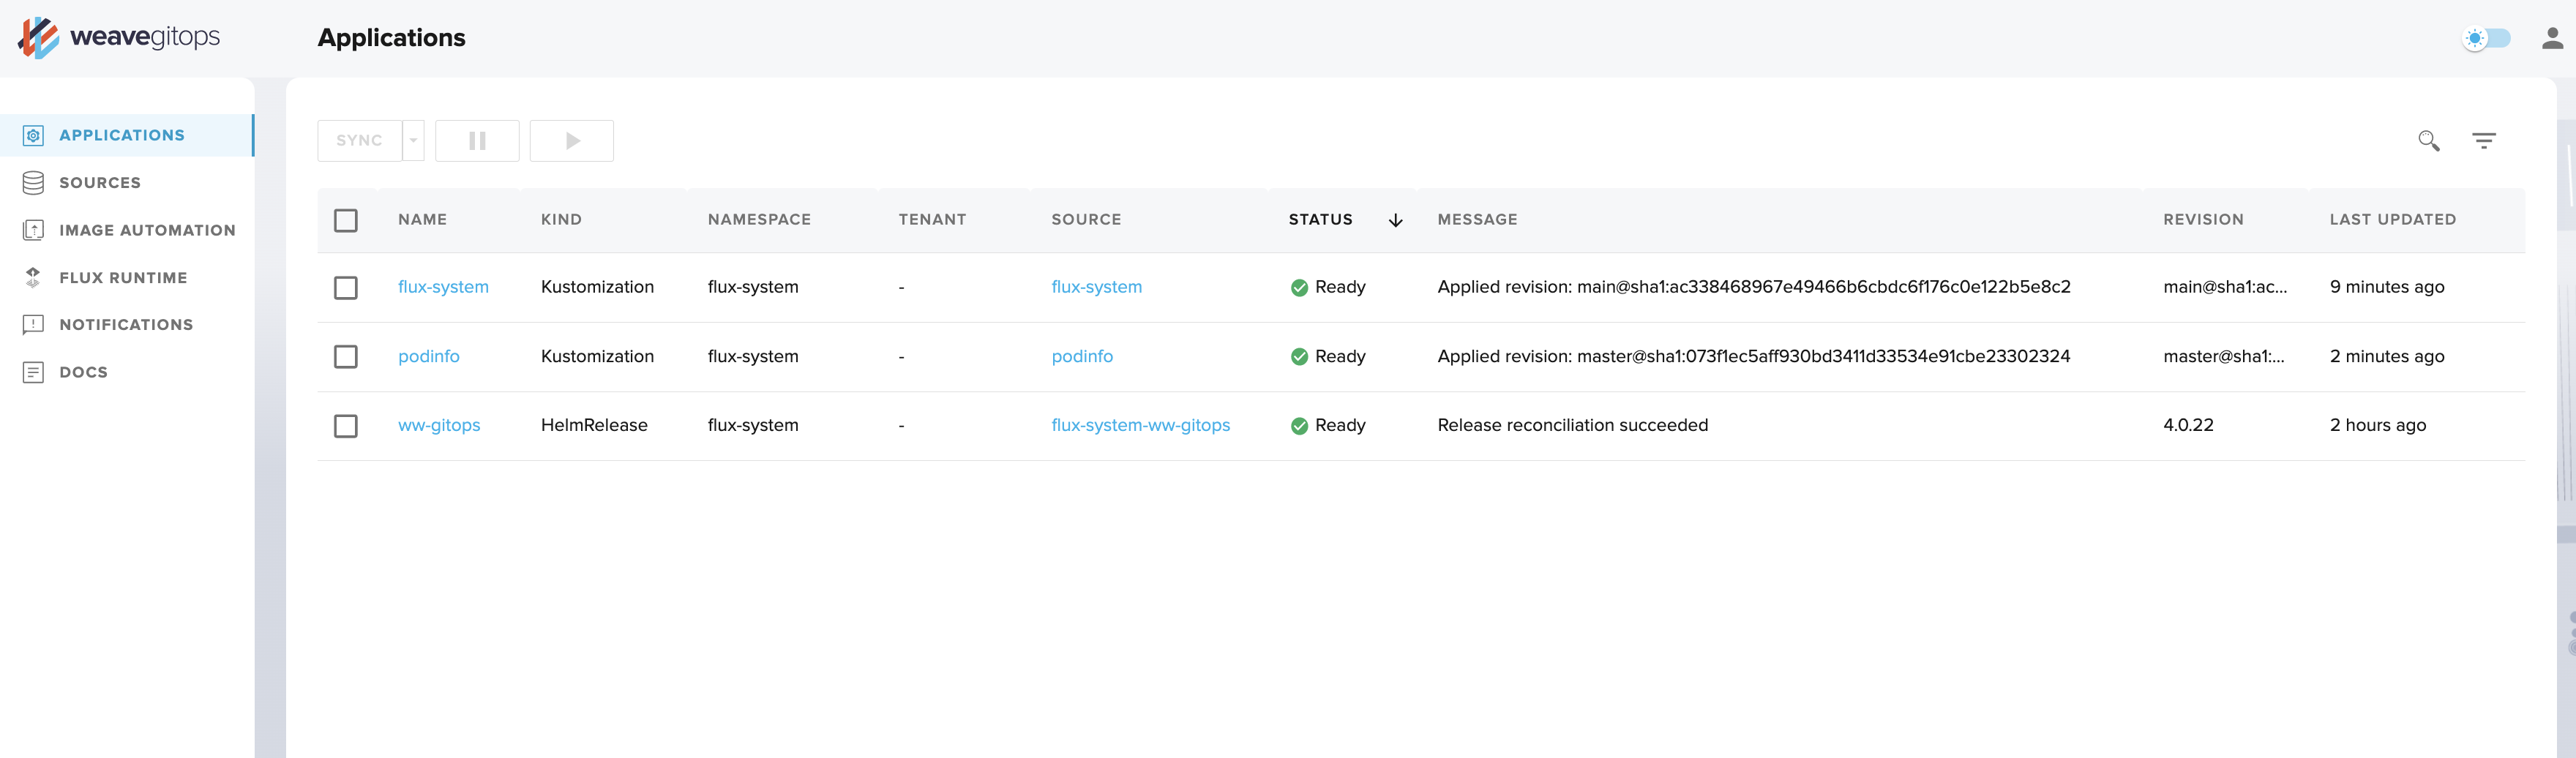
Click on podinfo to find details about the deployment. There should be two pods available.
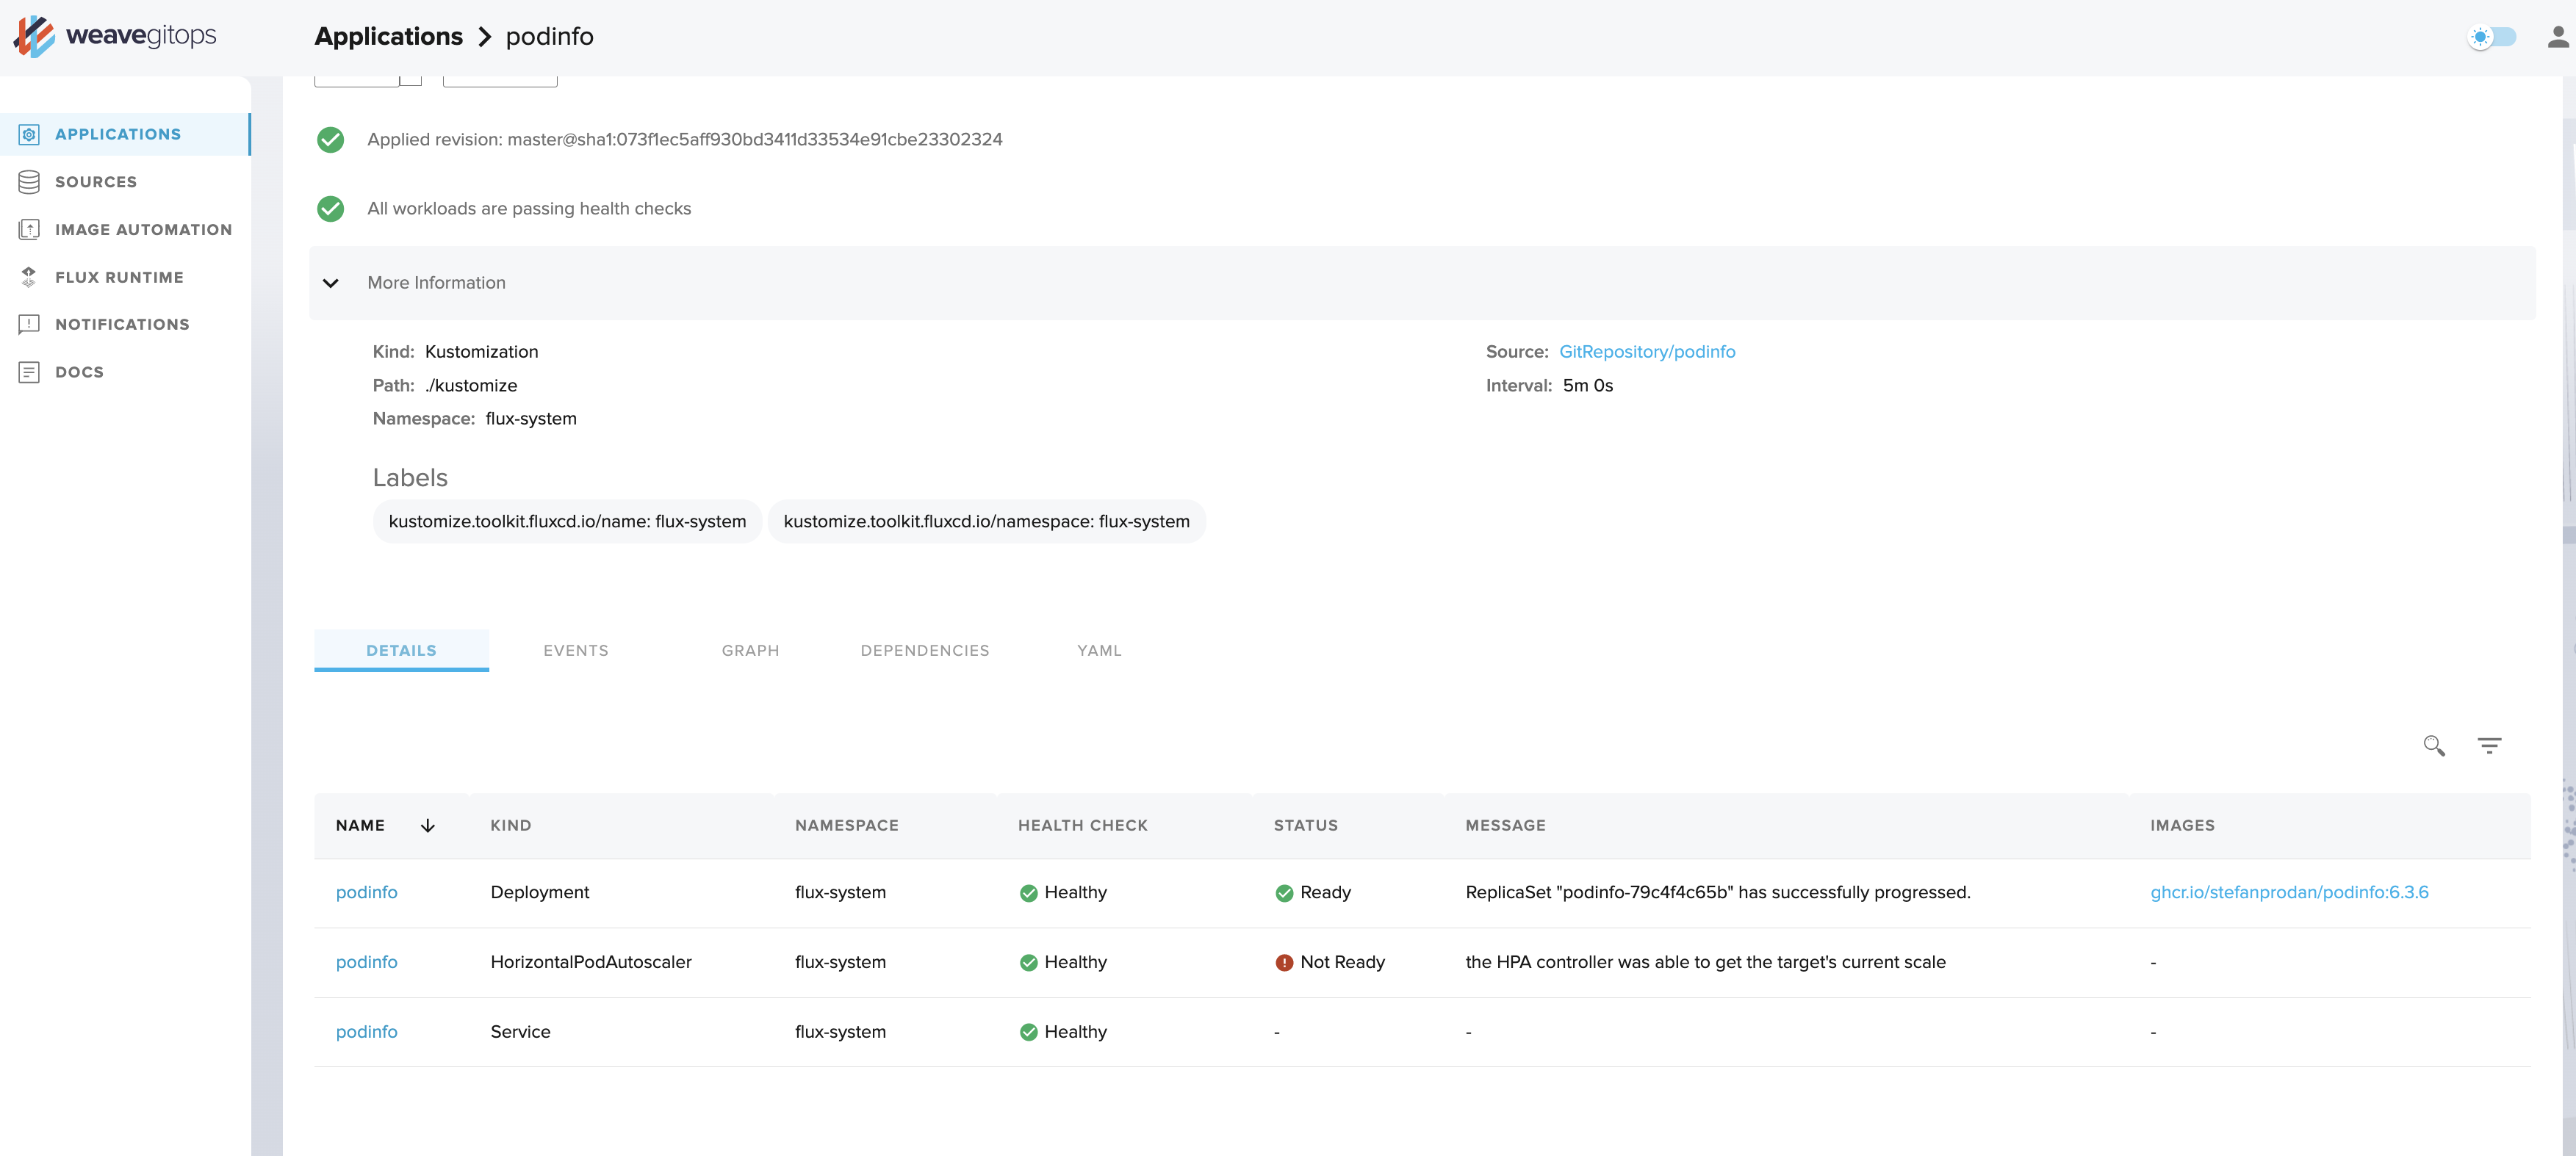
Podinfo comes with a HorizontalPodAutoscaler, which uses the metrics-server.
We don't use the metrics-server in this tutorial, but note that it's the reason why HorizontalPodAutoscaler will report as Not ready in your dashboard. We recommend ignoring the warning.
Customize podinfo
To customize a deployment from a repository you don’t control, you can use Flux in-line patches. The following example shows how to use in-line patches to change the podinfo deployment.
Add the
patchessection as shown below to the field spec of yourpodinfo-kustomization.yamlfile so it looks like this:Expand to see Kustomization patches
./clusters/management/podinfo-kustomization.yaml---
apiVersion: kustomize.toolkit.fluxcd.io/v1beta2
kind: Kustomization
metadata:
name: podinfo
namespace: flux-system
spec:
interval: 60m0s
path: ./kustomize
prune: true
sourceRef:
kind: GitRepository
name: podinfo
targetNamespace: flux-system
patches:
- patch: |-
apiVersion: autoscaling/v2beta2
kind: HorizontalPodAutoscaler
metadata:
name: podinfo
spec:
minReplicas: 3
target:
name: podinfo
kind: HorizontalPodAutoscalerCommit and push the
podinfo-kustomization.yamlchanges:git add -A && git commit -m "Increase podinfo minimum replicas"
git pushNavigate back to the dashboard. You should see a newly created pod:

Suspend updates
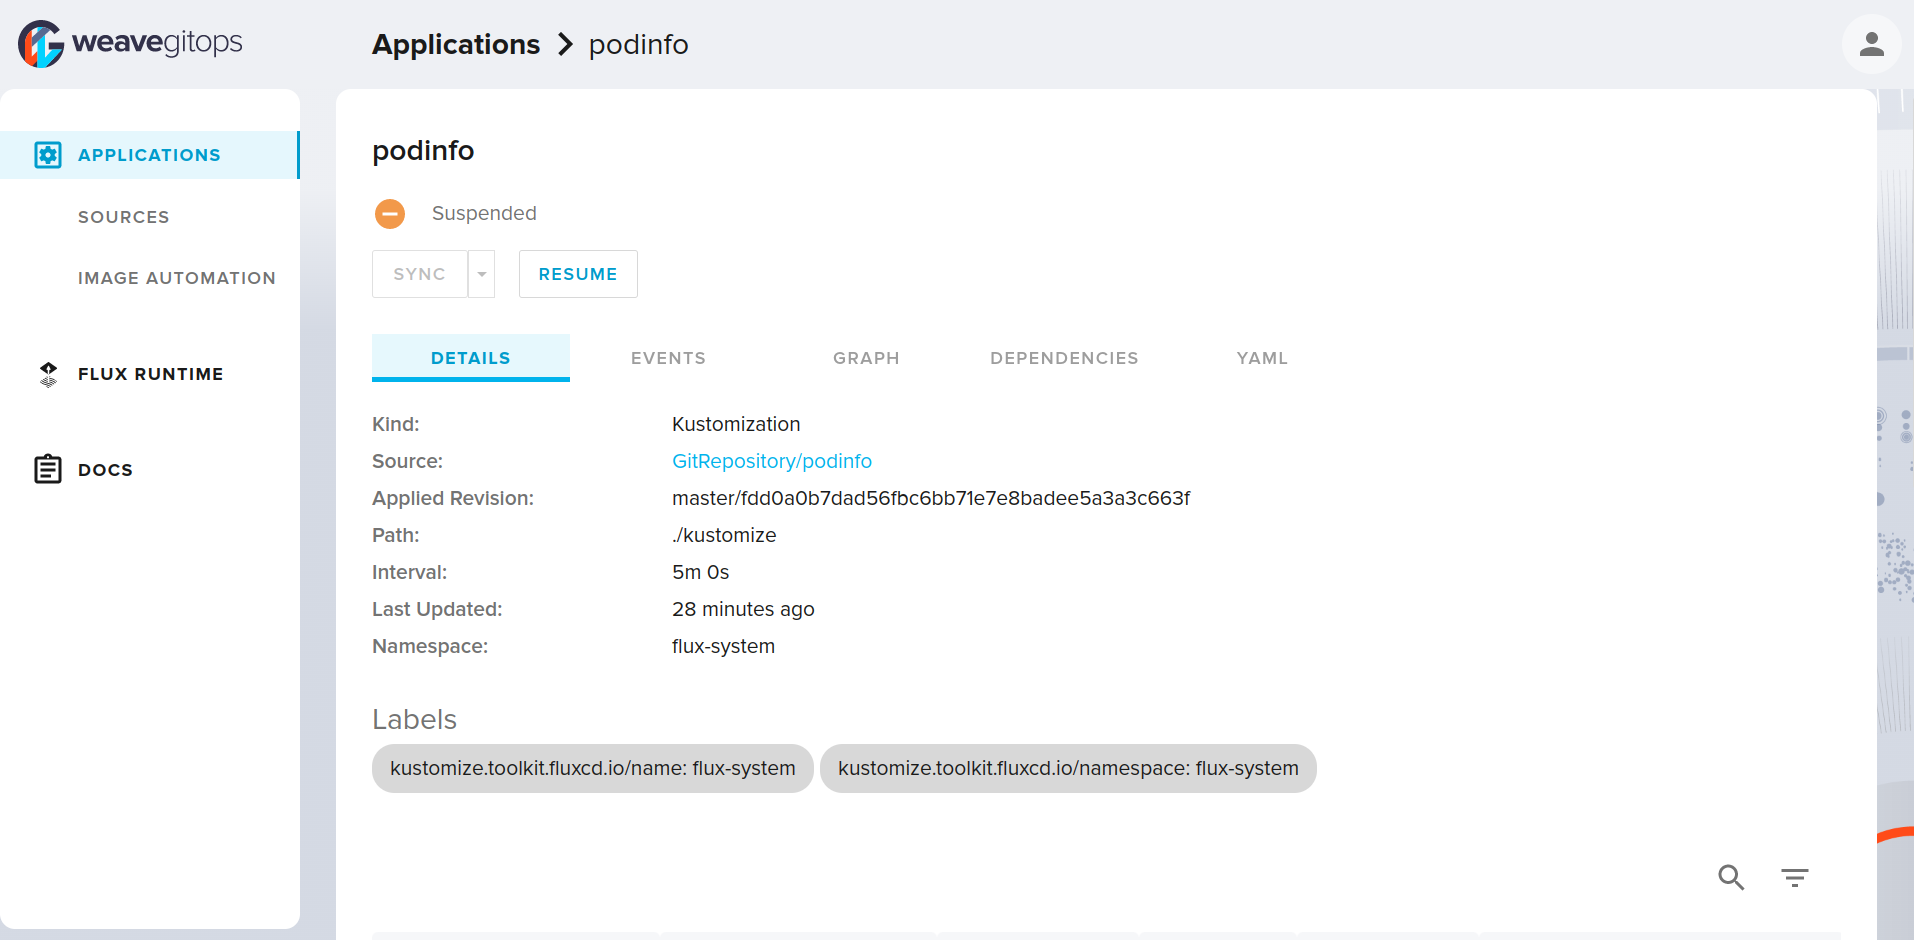
Suspending updates to a kustomization allows you to directly edit objects applied from a kustomization, without your changes being reverted by the state in Git.
To suspend updates for a kustomization, from the details page, click on the suspend button at the top, and you should see it be suspended:
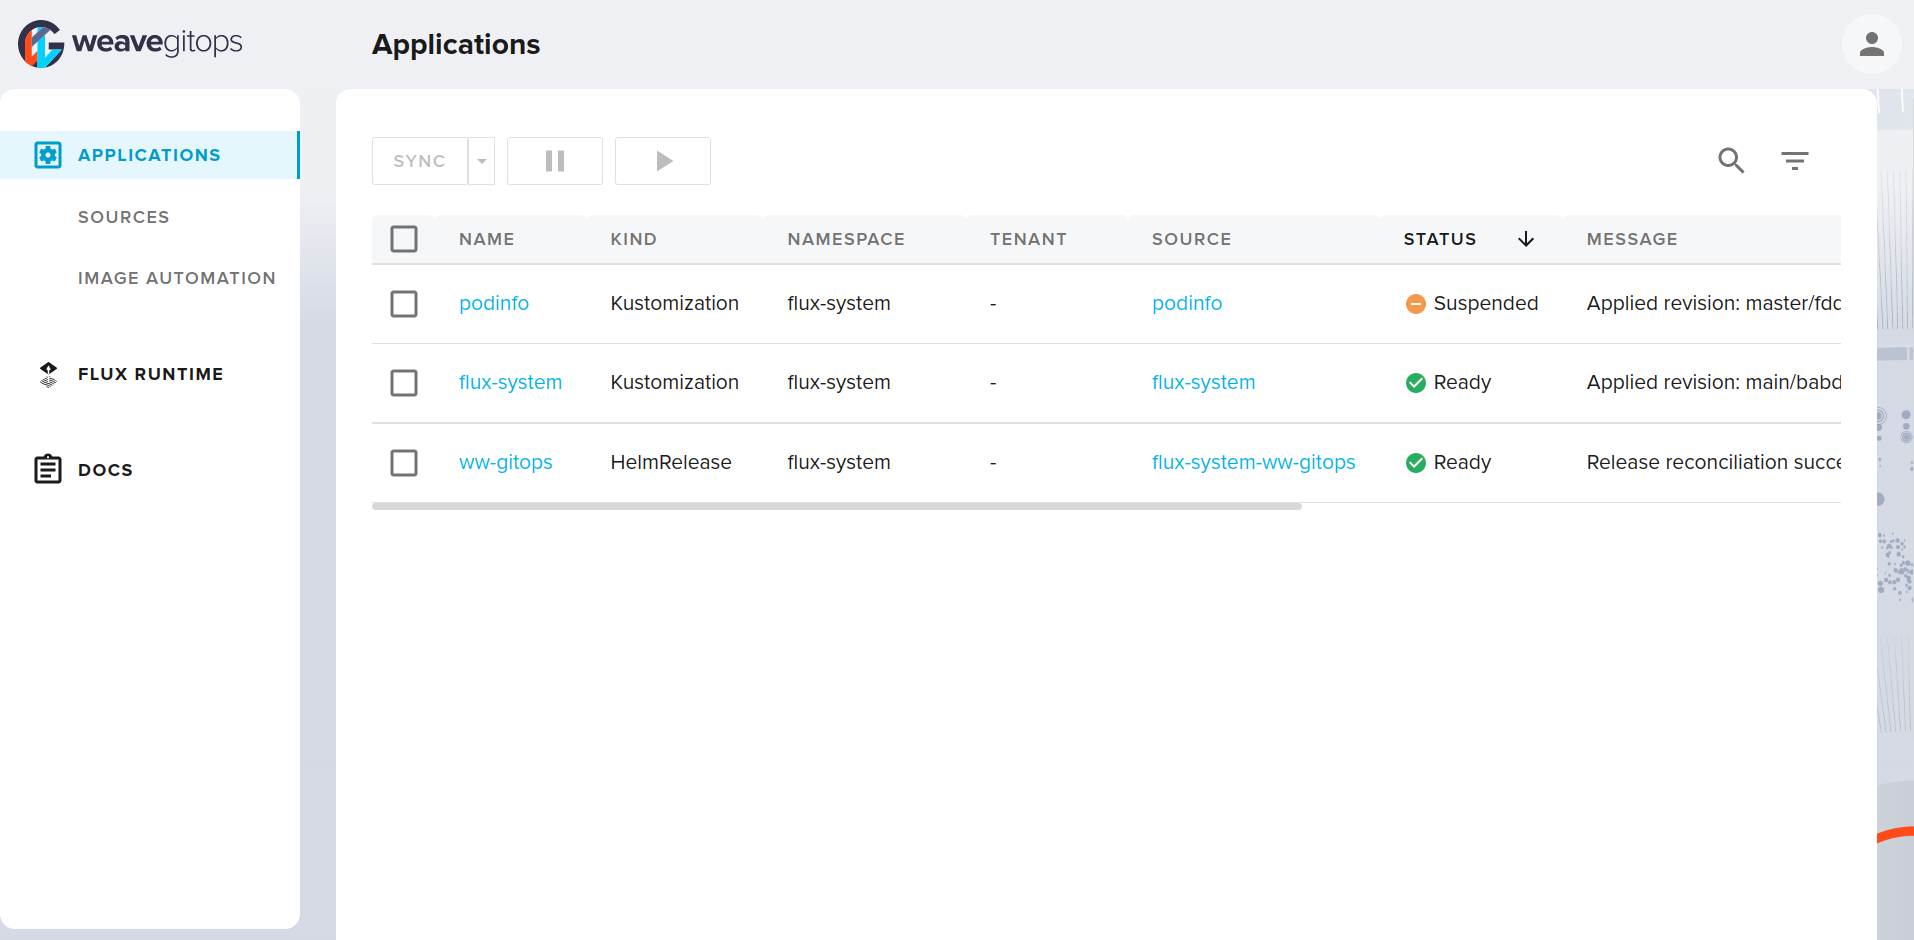
This shows in the applications view with a yellow warning status indicating it is now suspended
To resume updates, go back to the details page, click the resume button, and after a few seconds reconsolidation will continue.
Delete Podinfo
To delete Podinfo in the GitOps way, run this command from the root of your working directory:
  rm ./clusters/management/podinfo-kustomization.yaml
  rm ./clusters/management/podinfo-source.yaml
  git add -A && git commit -m "Remove podinfo kustomization and source"
  git push
Complete!
Congratulations 🎉🎉🎉
You've now completed the getting started guide. We welcome any and all feedback, so please let us know how we could have made your experience better.